Wednesday, September 4, 2013

Put a Rail on It

It's no Beyonce... but it sure is pretty!
Thanks to this brand new rail, our front porch makeover is almost complete.


You may remember last week, when I posted our DIY Retaining Wall and Landscaping project.
We took our boring front yard... 


... and transformed it from THIS:


To THIS!


But, even after installing the two retaining walls and landscaping... we weren't quite finished!


We wanted to add new columns and railings.


First up... the columns.
We purchased two QuickWrap kits from Menards.
It's a PVC column wrap - sold at most hardware stores - and comes with instructions.
You can install the wrap around existing columns.


First...
We removed the OLD column wraps from the porch.
(We just used a screw driver and popped out the old screws.)


After the column wraps were removed, the existing wooden poles remained.


Next...
Since we planned on attaching railings...
we needed to add some lumber blocks to the existing wooden poles.  
Otherwise, the NEW railings wouldn't be able to screw into anything.


My dad attached the lumber blocks to the places where he knew he'd screw in the railings.


Once the lumber blocks were in place...
We attached the base of the new wrap to the bottom of the existing poles.


See the white base at the bottom?
It's secured to the concrete floor with concrete screws.


Then...
It's time to cut your NEW wrap covers to height.
(We used a skill saw for this.)


Once the wrap covers are cut, you need to apply an adhesive to the corner seams...
and then set them in place around the existing poles.
(The adhesive comes with the QuickWrap kit -- and so do instructions.)


Once the new wrap is in place...
You'll need to secure the TOP piece of trim to your wrap.
My dad used adhesive and a Brad Nailer for this.


The transformation is amazing.
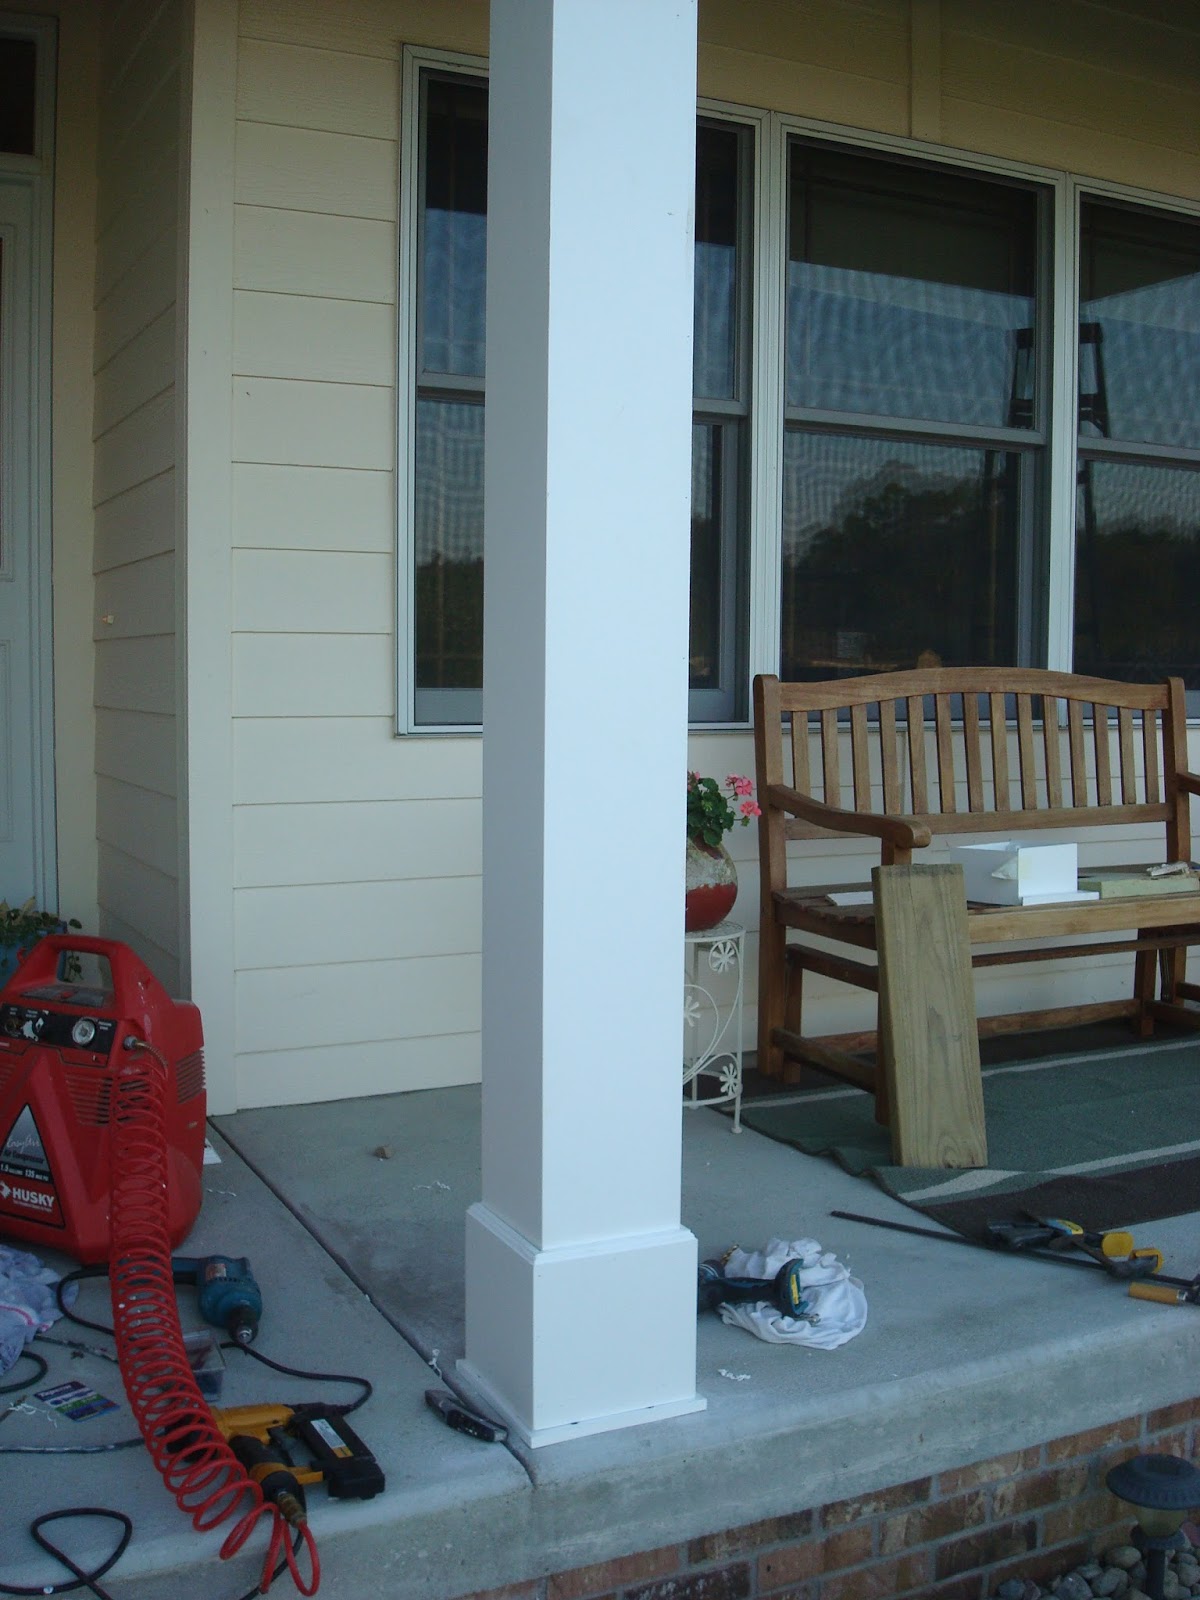

Then...
It's time to attach the railings!


We used a QuickRail kit that we purchased at Menards.
My dad trimmed them to size using his Compound Miter Saw.


Then, he attached the railings to the new poles with screws. 


REMEMBER - the poles are attached in the same areas where the lumber blocks were installed.


He also attached the railings to the side of the house 
using the screws that came with the QuickRail kit.


Finally...
You can spackle any holes in the new posts -- and paint!
(We kept ours white.)


And... tada!!!!
Done!


Looks pretty fantastic.


BEGINNING


MIDDLE


END


What do you think?


We LOVE it.
The railings add such a bold statement to the front of the house!


Over all, it was pretty easy to do.
We just followed the instructions that came with the QuickWrap and QuickRail kits.


Now we can sit back... and enjoy the view.


Wednesday, August 28, 2013

DIY Retaining Wall & Landscaping

It's been four years since my parents first moved into this adorable yellow house.
But, in four years... NO LANDSCAPING has been done in the front yard.


So, this summer my dad and I decided to change that... by tackling another DIY project!


We decided to do a "two-tiered" retaining wall.


First up...
We had to move the sprinkler heads away from the house.
We did this by digging down to the hose, trimming it, then moving the head farther out.
When you're done, cover the hose back up with dirt.


(You can see in this photo just how FAR we had to dig to move the sprinkler heads.)


Next...
We measured how big we wanted the retaining wall to be.
We used string line and wooden stakes to mark the height and length of each level.
(Remember, we decided to do TWO levels.)


Then...
We dug an outline in the dirt with a shovel.
You want to dig down at least four inches deeper than where your first row of block is going to be.


Add paver base on top of the dirt... and pack it down.
Your paver base needs to be LEVEL - since it's the base for your block.
(You can also add sand to help the blocks level out.)


Next...
Take a hammer and knock the back lip off each retaining wall block that 
will be used for your BOTTOM ROW.
Start at the edge, and work your way across the lip.


Notice how the lip comes off?
It's pretty easy.


BUT...
Remember - you only want the lip OFF for the BOTTOM row
You'll leave it on ALL the other rows.

The lip will help position your block - and hold your wall in place.


Then...
Start laying your first row.
Make sure the blocks are LEVEL!!!
Use a rubber mallet or dead blow hammer to help set the blocks.
(You may need to add or remove some paver base as you go along.)


Reminder...
As you're putting the blocks in place, make sure to stagger the block's joints!
(You don't want the joints to form a straight line up and down on the wall.)


Once the wall is built...
It's time to put on your cap blocks!
(These aren't necessary... but they do finish off the wall... and make it look nicer.)
They're held in place with retaining wall adhesive.
You just squirt a couple lines on the bottom of each block.


Then...
Get some landscape fabric.
You'll need this for the backside of your wall.

(This is a photo of my baby brother helping us out!)


Drape the fabric all along the backside of the wall from TOP to BOTTOM...


... and back-fill with pea gravel for drainage.
You'll need about 2-3 inches wide (of pea gravel) all along your wall.

(Unfortunately I don't have a picture of us pouring the pea gravel along the fabric. Sorry!!!)


As you're pouring the pea gravel... put dirt along side it. 
Fill the dirt all the way to the top.


Once the dirt is in... trim off the excess fabric.


Add a couple inches of compost to the dirt... and till it.
This will help your flowers and bushes grow.


Whew! 
Finally done with the wall!!!


Now that the wall is done...
It's time to start planting!


First...
We planted the bushes.
Ten total.


1.) We purchased six Spirea bushes...


... which have flowers in this pretty pink color.


2.) We also got a Rose of Sharon bush.
(My dad's favorite.)


It's a light shade of pink.


3.) And we purchased three hydrangea bushes...


... my favorite!


LOVE these!


Once the bushes were planted...
We draped more landscape fabric over the entire area.


We cut holes for the bushes...


... and secured the fabric in place with homemade stakes. 


We made our stakes by using electric fence wire.
But, you can EASILY buy ground stakes at any home improvement store.


TIME TO PLANT THE FLOWERS!


We stuck with three types of flowers:

1.) Coral Bells 
These came in another shade of pink.


2.) Hardy Mums 
These come in ALL sorts of colors - but we chose pink and red.


3.) Creeping Raspberry
This is a great plant that will drape over the retaining wall.


To start...
We cut a slit in the landscape fabric for our flowers...


... then used more stakes in-between each flower.


We added wood chips around the BUSHES... not the flowers.


You don't need to add wood chips - but we decided to - mainly because we like how it looks!


Finally...
ADD YOUR ROCK!
We purchased two-inch river rock...


... and scooped it around the bushes and flowers.


As an added BONUS...
We added river rock next to the bottom tier of our retaining wall.


We outlined the river rock with edging blocks...


... and used some larger rocks as accent pieces.


Whew.
FINALLY DONE!


What do you think?


BEFORE


AFTER


BEFORE


AFTER


The house finally has more "curb appeal."


It took us one month to complete, but I think the end result is pretty great!


Job well done, Dad!
You deserve a break...

Or maybe not.


We're actually not QUITE done yet.
Can you guess what we're doing to REALLY complete the front of the house?


I'll give you a clue...


Make sure to check back after Labor Day for the FINAL result!