I am always up for a design challenge.
But, let me tell you... I had NO IDEA how much work it would take to
transform these old, wooden dressers into gray, modern pieces.
My parents bought these dressers back in 1982 when they were newlyweds.
(Fast forward 30-years)...
My dad is very sentimental, and didn't want to give the old dressers away.
My dad is very sentimental, and didn't want to give the old dressers away.
So, my mom convinced him to let me paint them for the guest bedroom.
BEFORE
BEFORE
To start...
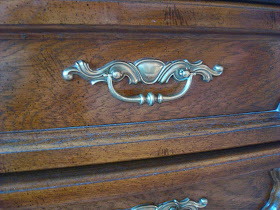
I removed all the old hardware.
(Just use a screw driver.)
Make sure you KEEP the old hardware.
Don't throw it away just yet!
(You may need to use the old screws for your new hardware pieces.)
After the hardware was taken off, I took the dressers outside.
Removed all the drawers....
... and began SANDING the dressers.
I used a "100 Grit" (Medium) sandpaper.
Give the entire wood surface a nice sanding.
You don't need to get ALL of the stain off.
This is what the pieces looked like when I was done sanding.
(My mom couldn't resist taking a photo of me working!)
Once you're done sanding...
Wipe the dressers off with a Tack Cloth.
You can buy them at any hardware store.
They help remove excess dust particles from the furniture.
Then...
TAPE OFF YOUR DRAWERS!
I love Frog Tape.
(But, Blue Painter Tape is fine too.)
I taped off the edges so the paint wouldn't bleed onto the sides and bottoms of the drawers.
Time to prime!
Because my pieces are made of DARK WOOD, I needed a primer.
I decided to use a standard, interior primer made by Behr.
As far as paint rollers go... you WANT to use a FOAM roller.
It will give you a smoother finish!
For brushes, find something decent that will also give you a smooth finish.
Give the dressers and FRONTS of the drawers a nice, even coat.
Let them dry.
Once the primer is dry...
It's time to SAND again!
But, this time you'll want to use a "Fine" or "Very Fine" sandpaper.
Gently sand the areas covered in primer.
Then, use the TACK CLOTH (once again) to wipe off any paint/dust particles.
Now it's time to PAINT!
I used two different Behr paint colors for the dressers:
"Sparrow" (lighter color) and "Gray Area" (darker color.)
The paint was purchased at The Home Depot.
Since I was doing a "two-toned" paint job on the dressers,
I started with the inside color first.
I chose "Sparrow" (the lighter shade of gray.)
To apply the paint, I used a small, foam roller.
I let the paint dry...
And then gave each drawer front a quick sanding with "Very Fine" sandpaper.
After sanding, I wiped it down AGAIN with the tack cloth...
... and put on a SECOND coat of the "Sparrow" (lighter) paint color.
Let the paint dry.
Time to tackle the OUTER portion of the drawers.
First, I taped off the inside part.
(I didn't want the two paint colors to bleed together.)
Using my FOAM roller...
I rolled on a layer of the "Gray Area" (darker) paint.
Remember - don't paint INSIDE the tape! That portion is already done!
Let the "Gray Area" paint dry.
Once the outer part is dry...
You'll want to SAND it (with the "Very Fine" sandpaper)
and then wipe off the surface with your tack cloth.
Brush on coat #2 of the "Gray Area" paint.
Remember - don't paint INSIDE the tape! Just the outside.
Let the paint dry for a few hours...
and then take the Frog Tape off.
Whew, almost done with the drawers!
Time to start painting the rest of the dresser.
First...
I taped off the insides of the dressers with Frog Tape.
I used my FOAM roller to roll on coat #1 of the "Gray Area" (darker) paint color.
Let this dry!
Then...
Get out that "Very Fine" sandpaper and rub down each dresser!
Wipe them off with a tack cloth.
And, roll on coat #2 of the "Gray Area" paint color.
Let the pieces dry overnight.
The next day...
You'll want to apply a protective finish to the dressers and drawers.
Make sure it's a WATER BASED polycrylic that is CLEAR SEMI-GLOSS.
(I used the "Minwax" brand - but there are others out there too.)
Apply one layer with a brush.
Let the protective finish dry overnight.
Then, remove any additional Frog Tape that remains on the dressers.
You're almost done!
To give the dressers a more "antique" finish...
I decided to use the "Very Fine" sandpaper ONE LAST TIME.
But, I only sanded the area where the two paint colors meet.
You can see where it has a little bit of a "worn" look.
Finally...
Put your new hardware on your drawers!
I ended up using the old screws (from the old hardware) to keep the new ones in place.
BEFORE and AFTER
The pieces ended up blending very nicely with the rest of the room.
To learn more about that transformation, click here.
I just love how the "two toned" dressers turned out.
I'm glad I put in the extra work to make it happen.
P.S. If you want to paint furniture WHITE, check out a previous blog post.


Download 16,000 Woodworking Plans & Projects
ReplyDeletehttp://woodworkingplanspro.weebly.com
Woodworking guide offers anyone of any skill level the ability to build amazing projects. The guide is extra helpful because it offers more detailed explanations, videos and blueprints then your typical woodworker magazine.
Hope it will help you next time !